Learn how to setup Azure Storage Explorer for File Transfer from your desktop computer to the Azure Cloud.
This guide will show you how to setup Azure Storage Explorer for File Transfer from your desktop computer to the Azure Cloud
Step 1: Install the Azure Storage Explorer application on your workstation
Visit site https://azure.microsoft.com/en-us/features/storage-explorer/
Click on the big blue button that says "Download Storage Explorer free"
This will start the download. Once completed you can click the downloaded file (StorageExplorer.exe) to install the program.
Step 2: Startup the Azure Storage Explorer
The “Connect to Azure Storage” Screen will come up. (If it does not, click the PLUG icon on the left of the window)
Select the option “Use a storage account name and key” highlighted below

Enter the Azure Storage Account that you received from UberCloud in the next screen. (This information will be in your welcome email. If you don’t have this info, contact UberCloud support)
Copy the Account key exactly making sure there are no spaces before or after
Account Name:
Account Key:
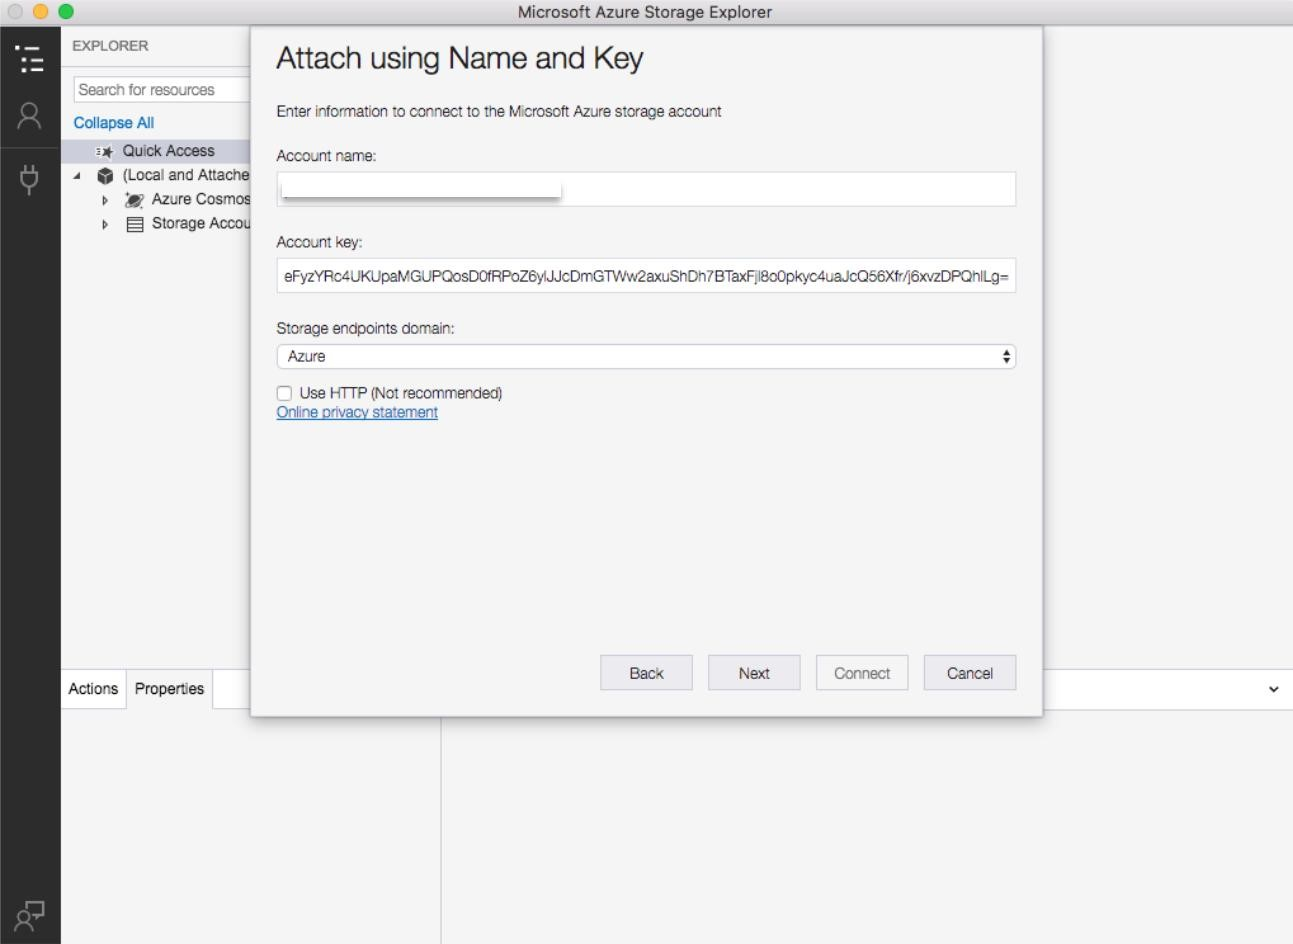
Click Next. And then on the next screen click Connect.
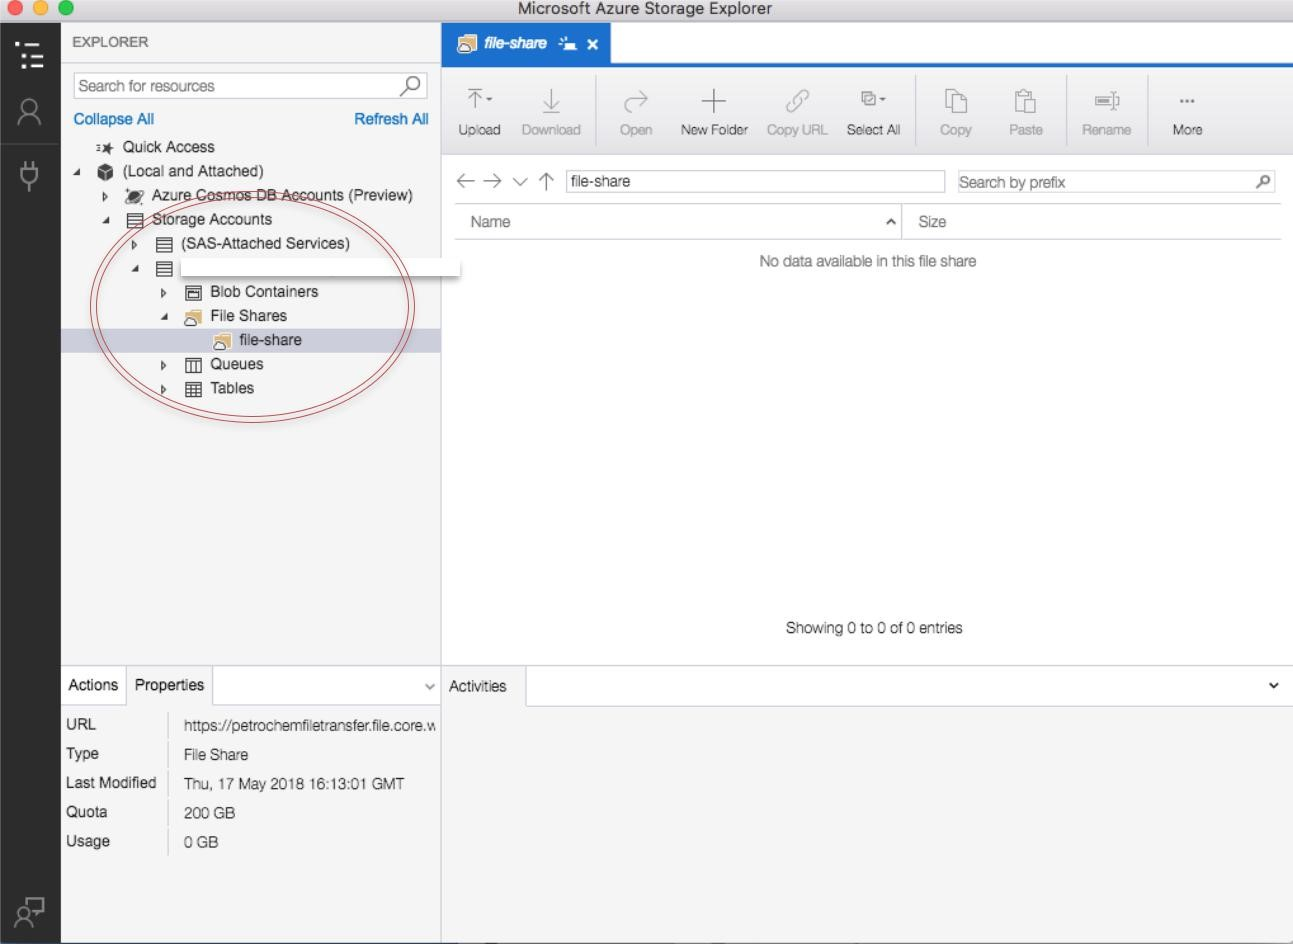
Now you can select the newly attached Storage Account in the menu on the left, and navigate to file-shares
Then you can drag and drop files into the window on the right and they will start getting transferred.
Was this article helpful?
That’s Great!
Thank you for your feedback
Sorry! We couldn't be helpful
Thank you for your feedback
Feedback sent
We appreciate your effort and will try to fix the article